Network Notes Online User Guide
Online User Guide Index
3. View / Manage Incoming SMS (Inbox)
4. View / Manage outgoing SMS (Outbox)
5. Manage the contact list (Phonebook)
6. Manage the SMS template (Canned
Message)
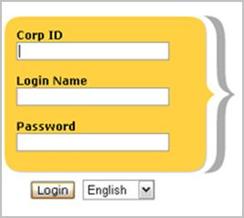
1. User Login
User Login page is used for system authentication. Users are required to input their Corp ID,
Login Name and Password to log into the Network Notes.

![]()
![]()
![]()

![]()
![]()
1. Sending SMS (Composer)
User can use the Composer
function to send Single SMS (One message to one or more recipients) or Batch
SMS (Multiple messages to one or more recipients).
1.1. Compose Single SMS

![]()
![]()
![Rounded Rectangle: 5. Click the [Submit] button to preview SMS, or click [Clear] to clear all the input fields.](nnn_userguide_user_en_US_files/image014.gif)
![]()
![]()
![]()
![]()

![]()
![]()
![]()
![]()
![]()
![]()
![]()
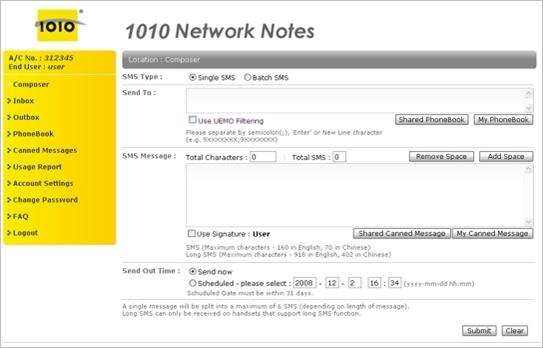
Fig.3 Compose Page – Single SMS
Step 1. Select
Single SMS for SMS Type
Step 2. Input
the recipient’s Mobile No.
User can input the recipient’s mobile number in the Send To textbox, and all mobile numbers should be separated by semi-colon (;), ‘Enter’ or New Line character.
User also can select the recipient’s mobile no. from [My Phonebook] function (See Fig.4, 5) or [Shared Phonebook] function (See Fig.6).
For the UEMO Filtering subscriber, they can select the Use UEMO
Filtering option to enable the function.
After clicking [My Phonebook] or [Shared Phonebook] function, users will see a popup
screen as below.
![]()


![]()
![]()
![Rounded Rectangle: Click the [Add] button to add the selected Individuals’ mobile number(s) or click [Cancel] button to cancel the selection(s)](nnn_userguide_user_en_US_files/image034.gif)
![]()

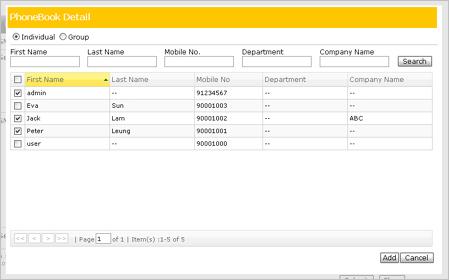
Fig.4 Composer - Phonebook Individual Selection Page
![]()
![]()
![]()
![]()
![Rounded Rectangle: Click the [Add] button to add all Individuals’ mobile numbers under the selected Groups. or click the [Cancel] button to cancel the selections.](nnn_userguide_user_en_US_files/image044.gif)

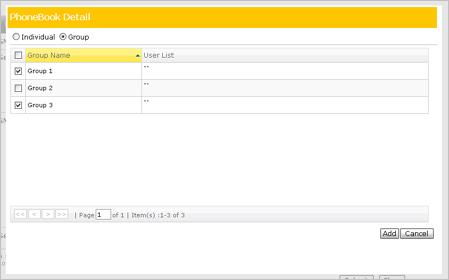
Fig.5 Composer - Phonebook Group Selection Page
After clicking the
[Shared Phonebook] function, users will see the popup screen as below.
![]()
![]()
![Rounded Rectangle: Click the [Cancel] button to close this pop up window.](nnn_userguide_user_en_US_files/image051.gif)
![Rounded Rectangle: Click [Select] to select the Shared Phonebook and it will show the Phonebook detail as Fig.4, 5.](nnn_userguide_user_en_US_files/image052.gif)
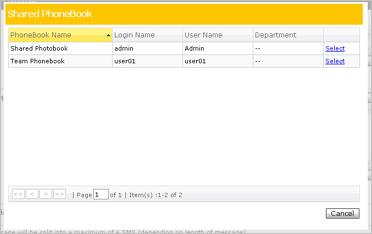
Fig.6 Composer - Shared Phonebook Selection Page
Step 3. Input SMS Message
User can input message content
into the SMS Message textbox, and user can click the
[Remove Space] button to remove
all the spaces in the message
or click the [Add Space] button to add space to the message. On the top
of the SMS
Message textbox, the
user can see the Total Characters used for the message and
the Total SMS required for the message.
User can also select the SMS template from
My Canned Message (See Fig.7) or Shared Canned Message (See Fig.7).
If user selected the Use Signature option, the signature will be added at
the beginning of the message, and the signature characters will be counted into the Total Characters of the SMS.
After clicking [My Canned Message] or [Shared Canned
Message], user will see the popup screen shown as below.
![]()
![]()
![]()

![]()
![Rounded Rectangle: Click the [Add] button to add SMS template from the selected message or click the [Cancel] button to cancel the selection.](nnn_userguide_user_en_US_files/image059.gif)
![Rounded Rectangle: Click the [Cancel] button to close this pop up window.](nnn_userguide_user_en_US_files/image060.gif)

![]()
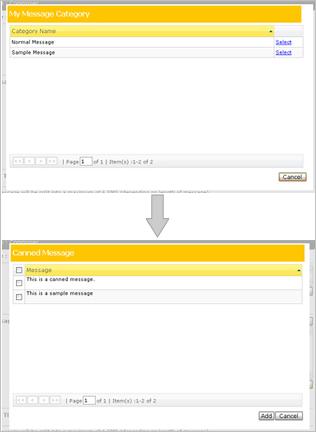
Fig.7 Composer - Select Message Category and Canned Message
Step 4. Input Sent Out Time
User
can select the Send Now option or the Scheduled option in the Send Out Time section,
in order to send the inputted SMS message immediately or define a scheduled for
the inputted SMS message. Please note that the scheduling time must be within 31days.
Step 5. Click the [Submit] button to preview the SMS, or click the
[Clear] button to clear all input fields.
After
clicking the [Submit] button in the Compose page, user can preview the message as below.
![]()
![]()
![Rounded Rectangle: Click the [Submit] button to submit the SMS to sending job or click the [Cancel] button to void the submission.](nnn_userguide_user_en_US_files/image067.gif)
![]()

![]()

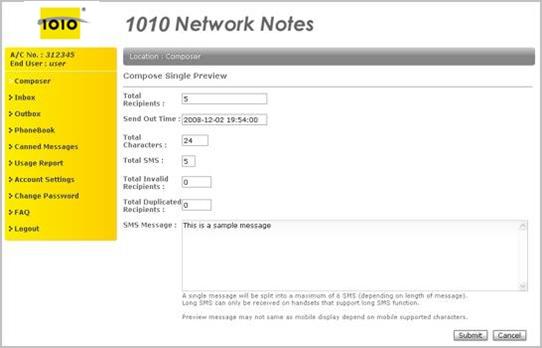
Fig.8 Single SMS Preview
![Rounded Rectangle: Click the [OK] button to back to the Compose page](nnn_userguide_user_en_US_files/image075.gif)

Fig.9 Compose SMS success
1.2. Compose Batch SMS

![]()
![]()
![]()

![]()
![]()
![]()
![]()

![]()
![]()

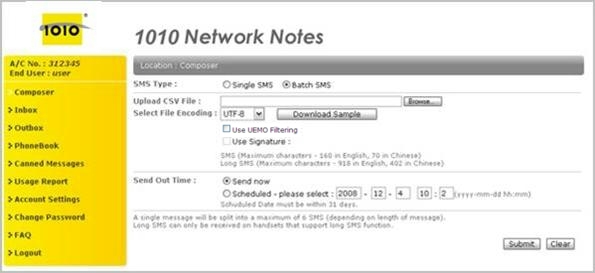
![Rounded Rectangle: 6. Click the [Submit] button to preview the SMS, or click the [Clear] button to clear all the input fields.](nnn_userguide_user_en_US_files/image093.gif) Fig.10 Compose Batch SMS
Fig.10 Compose Batch SMS
Step 1. Select
Batch SMS for SMS Type.
Step 2. Select
the Upload CSV File
User can click the [Browse] button to select the Upload
CSV File from local machine and user must select the File Encoding (such as ASNI, Big5, GB2312, UTF-8, UTF-16) before
submit the upload file.
User can click the [Download Sample] button to download a CSV Sample for import function. It is allows the user input multiple messages to one or more recipients.
Step 3. Select the Use UEMO Filtering.
For
the UEMO Filtering subscriber, they can select the Use UEMO Filtering option to
enable the function.
Tips : When UEMO DNC (Unsolicited Electronic
Messages Do-not-call Filtering) Filtering is enabled, system will check
the submitted mobile numbers with updated DNC Registers
and filter all those mobile numbers contained in the DNC
Registers automatically before sending out.
For details of UEM Ordinance and DNC Registers please browse OFTA and DNC
website.
Step 4. Use Signature options
If user selected the Use Signature option, all of the messages enclosed in the upload file will be attached
with the signature at the
beginning of each message, and the
signature characters will be counted into the Total Characters
used of the SMS.
Step 5. Input Send Out Time
User
can select the Send Now option or the Scheduled option in the Send Out Time section,
in order to send the inputted SMS message immediately or define a scheduled for
the inputted SMS message. Please note that the scheduling time must be within 31days.
Step 6. Click the [Submit] button to preview the SMS, or click the
[Clear] button to clear all input fields.
After
clicking the [Submit] button on the Compose page, user can preview the SMS as below.
![Rounded Rectangle: Click the [Submit] button to submit the SMS to sending job or click the [Cancel] button to void the submission.](nnn_userguide_user_en_US_files/image094.gif)
![]()


![]()
![]()

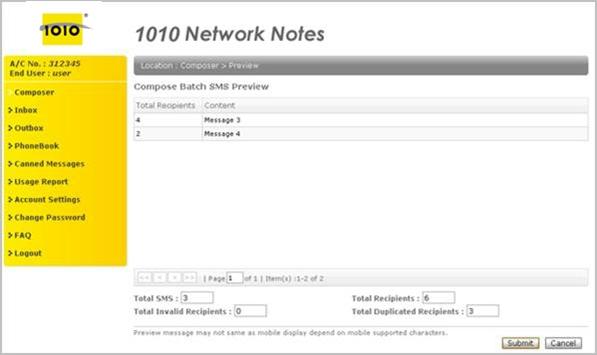
Fig.11 Compose Batch SMS Preview
2. View / Manage Incoming SMS (Inbox)
In the Inbox page, user can view and manage the Incoming SMS and they
can search for SMS records, delete, reply and forward SMS or export selected SMS
to a CSV file.
![]()
![]()
![]()


![]()
![]()
![]()
![]()
![]()
![]()

![]()
![]()
![]()


Step 1. Input search criteria to search the incoming SMS.
User
can input the Received Date, First Name, Last Name and Mobile No. for searching the incoming SMS. The Received Date range must be within 90 days.
Step 2. View the SMS details.
User click [View] to view the incoming SMS details, user will see a popup screen shown as below.
![]()
![]()


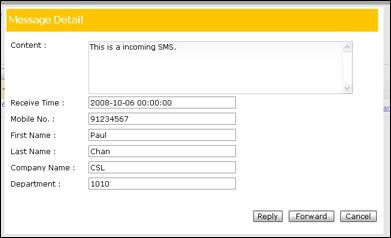
Fig.13 Inbox - Message Detail
Step 3. Add the sender’s mobile number to Phonebook.
User
click [Add Contact] to add the sender’s mobile number to Individual
Phonebook,
user will see a popup screen as below.
![]()
![]()
![Rounded Rectangle: Click the [Add] button to add the new Individual or click the [Cancel] button to void this action.](nnn_userguide_user_en_US_files/image134.gif)
![]()
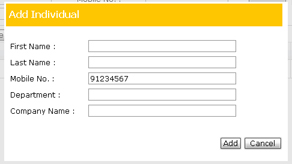
Fig14. Inbox - Add Individual
Step 4. Reply to sender or Forward the SMS.
User can click [Reply] to reply a message to the sender. System will redirect user to the Composer page, and filled the sender no. in for the recipient.
User can click [Forward] to forward the selected message. System will redirect user to the Composer page, and filled the selected SMS content in SMS Message.
Step 5. Export the search result to CSV.
User
can click the [Export CSV] button to export the search result to a CSV file.
Step 6. Delete the Incoming SMS.
User
can select the record(s) and click [Delete] to delete the selected record(s).
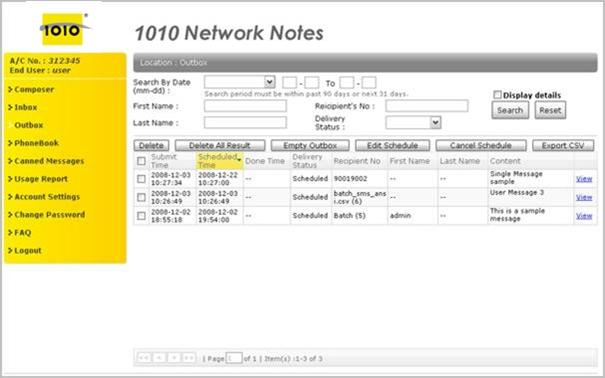
3. View / Manage outgoing SMS (Outbox)
In the Outbox page, user can view and manage the SMS sending job. User can edit the schedule
time of a
scheduled
job, cancel and delete the scheduled job or export the search result of SMS sending jobs to a CSV file.


![]()
![]()


![]()
![]()

![]()


![]()
![]() Fig.15 Outbox
Fig.15 Outbox
Step 1. Select the Display details option.
If
the Display details option (Default View) is
disabled,
the Outgoing SMS will be grouped by the SMS sending job.
If
the Display details option (Detail View) is
enabled,
all of the sending job’s Outgoing SMS will be listed with detail.
Step 2. Input search criteria to search SMS sending job/Outgoing SMS.
User can input the Done Date/Scheduled Date/Submit Date, First Name, Last Name and Mobile No. to searching for the incoming SMS. All the Date range must be
within past 90 days or next 31days.
Step 3. View the SMS details.
User
can click [View] to view outgoing SMS details, and there are 3 different views
to show the record detail.
View
1 – Multiple messages to one or more recipient
![Rounded Rectangle: Click the [Back] button to go back to Outbox page.](nnn_userguide_user_en_US_files/image158.gif)
![Rounded Rectangle: Click [Forward] to forward the message. System will redirect user to Composer page, and filled this SMS content in SMS Message field.](nnn_userguide_user_en_US_files/image159.gif)
![]()
![]()
![]()
![]()
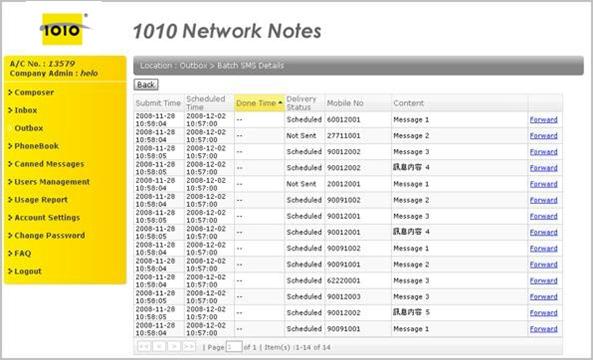
Fig.16 Outbox – Batch SMS Detail
View
2 – One message to one or more recipient
![Rounded Rectangle: Click [Forward] to forward the message. System will redirect user to the Composer page, and filled the SMS content in the SMS Message.field](nnn_userguide_user_en_US_files/image166.gif)

![]()
![]()
![]()

![]()
![]()
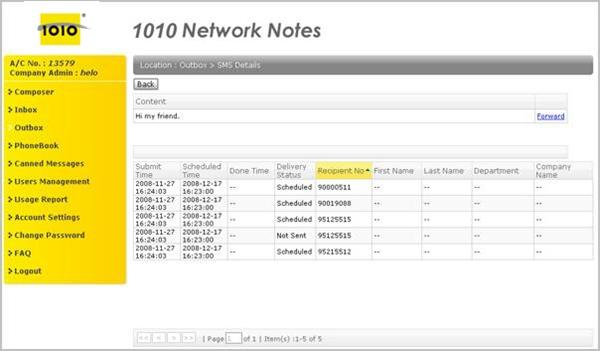
Fig.17 Outbox – SMS Detail
View 3 – One message to one recipient
![Rounded Rectangle: Click the [Forward] button to forward the message. System will redirect user to the Composer page, and filled the SMS content in the SMS Message field.](nnn_userguide_user_en_US_files/image173.gif)
![]()
![]()
![]()

![]()
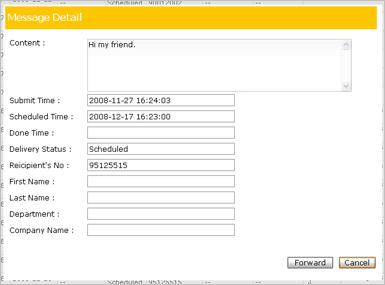
Fig.17 Outbox – Message Detail
Step 4. Export the search result to CSV.
User can click the [Export CSV] button to export the search result to a CSV file.
Step 5. Edit or Cancel SMS sending job/Outgoing SMS.
User can click the [Cancel Schedule] button to cancel the scheduled message of the
selected record(s) or can
click the [Edit Schedule] button to edit the Scheduled Time of one selected record.
* If user canceled or edit the
scheduled Outgoing SMS in Detail View, the related Outgoing SMS in the same sending job will also be
canceled or edited.
User
will see the below popup screen after clicking the [Edit Schedule]
button.
![Rounded Rectangle: Click the [Save] button to update the Scheduled Time or click the [Cancel] button to void the action.](nnn_userguide_user_en_US_files/image181.gif)
![]()
![]()
![]()
![]()
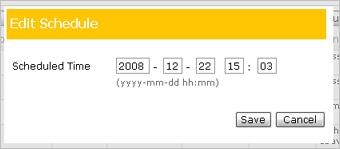
Fig.18 Outbox – Edit Schedule
Step 6. Delete SMS sending job/Outgoing SMS.
User can click the [Delete] button to delete the selected record(s), click the [Delete All Result] button to delete all the search result record(s) or click the [Empty Outbox] button to delete all the records in Outbox.
* If user
delete the Outgoing SMS in Detail View, all related Outgoing SMS in the same sending job will be deleted.
4. Manage the contact list (Phonebook)
Phonebook page is used to save users’ contact lists and they can create a Shared Phonebook to share their contact
lists to other users.
Phonebook is divided into Individual, Group and Shared Phonebook.
4.1. Phonebook Individual
![]()
![]()
![]()
![]()


![]()

![]()
![]()
![]()
![]()
![]()
![]()
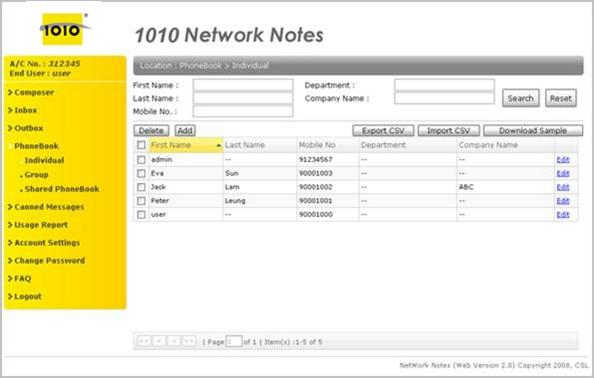
Step 1. Input search criteria to search Individual.
User
can input the First Name, Last Name, Mobile Number, Department and Company Name for searching the Individual
records.
Step 2. Export/Import Individual records.
User
can click the [Export CSV] button to export the Individual records to a CSV file, or click the [Import CSV] button to import
Individual records by uploading a CSV file.
User
can also click the [Download Sample] button to download the CSV sample for import CSV
function.
Step 3. Add or Edit Individual.
User
can click [Add] / [Edit] to add or edit Individual details and user will see a popup screen shown as below.
![Rounded Rectangle: Click the [Add] / [Save] button to add or update Individual or click the [Cancel] button to cancel the action.](nnn_userguide_user_en_US_files/image204.gif)
![]()
![]()
![]()
![]()

![]()
![]()
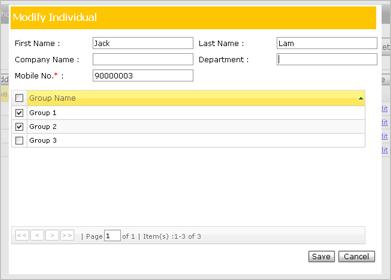
Fig.20 Add or Edit Individual
Step 4. Delete Individual.
User
can click the [Delete] button to delete the selected Individual.
4.2. Phonebook
Group
Group Phonebook
is used to manage the Individual contact by grouping.
![]()
![]()

![]()

![]()

![]()
![Rounded Rectangle: 1. Input the search criteria and click the [Search] button to search for Group records.](nnn_userguide_user_en_US_files/image222.gif)
![]()
![]()
![]()
![]()
![]()
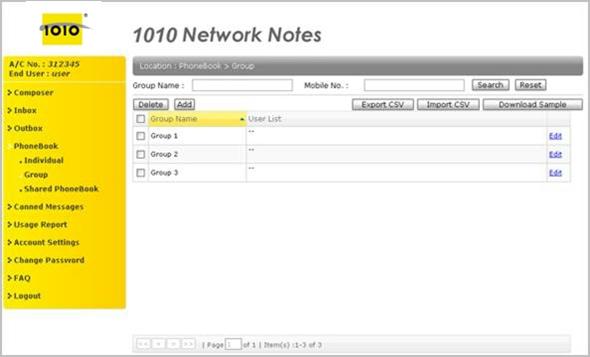
Step 1. Input search criteria to search Group.
User
can input Group Name and Mobile No., for searching
Group records.
Step 2. Export or Import Group records.
User
can click the [Export CSV] button to export the Group records to a CSV file, or click the [Import CSV] button to import Group
records by uploading a CSV file.
User
also can click the [Download Sample] button to download a CSV sample for the import CSV
function.
Step 3. Add Group.
User
can click the [Add] button to add a new Group and user will see the popup screen shown as below.
![]()
![Rounded Rectangle: Click the [Add] button to add the new Group or click the [Cancel] button to cancel the action.](nnn_userguide_user_en_US_files/image231.gif)
![]()
![]()
![]()

Fig.22 Add Group
Step 4. Edit Group.
![Rounded Rectangle: Select the Group member(s) and click the [Delete] button to delete the selected member(s).](nnn_userguide_user_en_US_files/image237.gif)
![]()
![Rounded Rectangle: Click the [Add] button to add a new Group member. See Fig.24](nnn_userguide_user_en_US_files/image239.gif)
![Rounded Rectangle: Click the [Rename] button to rename the Group name](nnn_userguide_user_en_US_files/image240.gif)


![]()
![]()
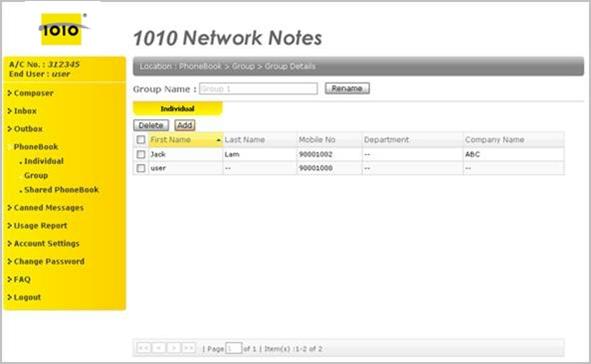
Fig.23 Edit Group detail
![]()
![Rounded Rectangle: Select the individual(s) and click the [Add] button to add individual(s) into the group](nnn_userguide_user_en_US_files/image248.gif)
![Rounded Rectangle: Input the search criteria and click the [Search] button to search for the Individual.](nnn_userguide_user_en_US_files/image249.gif)
![]()

![]()
![]()
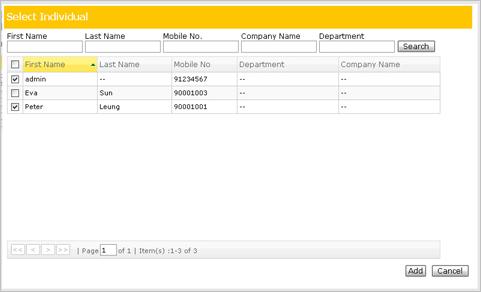
Fig.24 Phonebook Group add member
Step 5. Delete Group.
User
can click the [Delete] button to delete the selected Group.
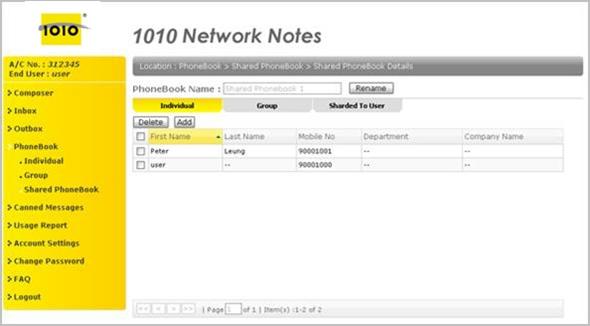
4.3. Shared Phonebook
Users
can create a Shared
Phonebook and share the phonebook to other users. Shared Phonebook can contain
your Individual contact and Group contact.
![]()
![]()
![]()
![]()


![]()

Step 1. Add Shared Phonebook.
User can click the [Add] button to created a new Shared Phonebook and user will see the popup screen shown as below.
![]()
![]()
![Rounded Rectangle: Click the [Add] button to add Shared Phonebook or click the [Cancel] button to cancel the action.](nnn_userguide_user_en_US_files/image265.gif)
![]()
![]()
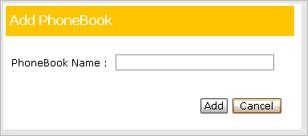
Fig.26 Add Phonebook
Step 2. Edit Shared Phonebook.
User can define the Individual List and Group List in this Shared Phonebook, and enable the sharing function of a Shared Phonebook to other user.

![]()

![]()

![Rounded Rectangle: Select the user(s) and click the [Delete] button to remove from user(s) sharing list.](nnn_userguide_user_en_US_files/image279.gif)
![]()
![]()

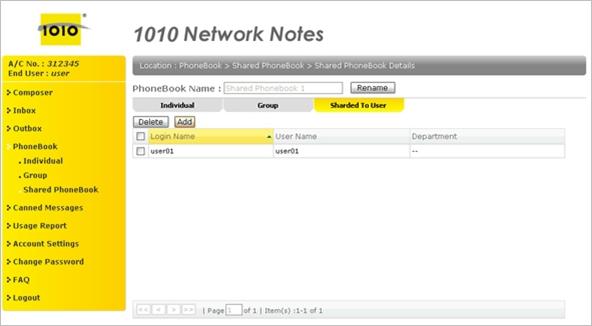
Fig.28 Edit Shared Phonebook detail – Shared To User
![Rounded Rectangle: Select the user(s) and click the [Add] button to add the selected user(s) to the sharing list of this Shared Phonebook](nnn_userguide_user_en_US_files/image287.gif)
![]()
![]()


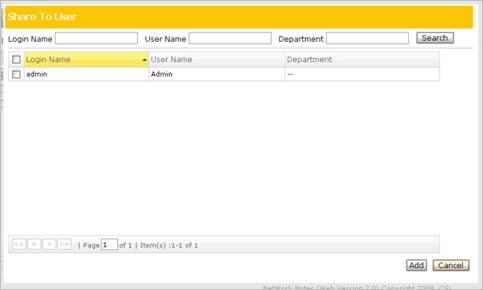
Fig.29 Share phonebook – Share to user
Step 3. Delete Shared Phonebook.
User
can click the [Delete] button to delete the selected Shared Phonebook.
5. Manage the SMS template (Canned Message)
Users can add
canned messages in different Message Categories for future uses in compose SMS,
and Message Categories are
allowed to share to other users.
![]()
![]()
![]()
![]()


![]()
![]()
![]()
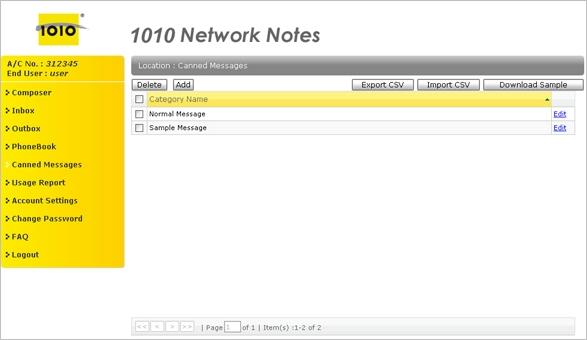
Fig.30 Canned
Message – Message Category
Step 1. Add Message Category.
User can click the [Add] button to add Message
Category and user will see the popup screen shown as below.
![]()
![]()
![]()
![Rounded Rectangle: Click the [Add] button to add Message Category or click the [Cancel] button to cancel the action.](nnn_userguide_user_en_US_files/image305.gif)
![]()

Fig.31 Add Category
Step 3. Export or Import Message Category records.
User can click the [Export CSV] button to export the
Message Category and Canned Message to a CSV file, or click the [Import CSV] button to import
Message Category and Canned Message records by uploading a CSV file.
User
also can click the [Download Sample] button to download a CSV sample for the import function.
Step 3. Edit Message Category.
In
Message Category detail page, user can add Canned Message and share the
selected Message
Category to other users.
![Rounded Rectangle: Click the [Delete] button to delete the selected message.](nnn_userguide_user_en_US_files/image308.gif)
![]()


![]()
![]()
![]()
![]()
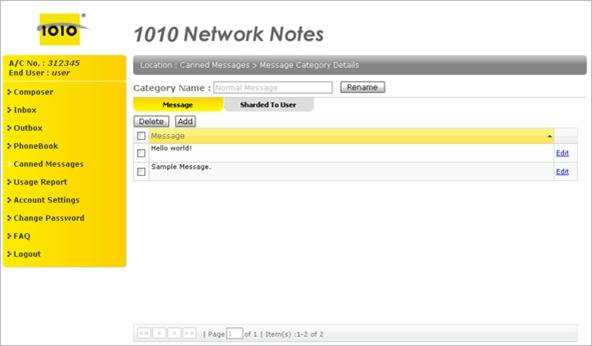
![Rounded Rectangle: Click the [Add] button to add Canned Message or click the [Cancel] button to cancel the action.](nnn_userguide_user_en_US_files/image319.gif)
![]()
![]()
![]()
![]()
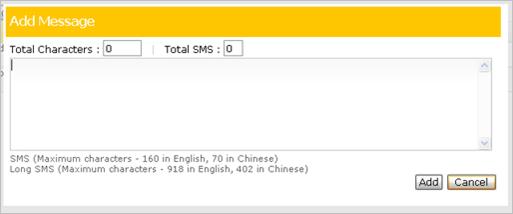
Fig.33 Add or Edit Canned Message.
Step 3. Delete Message Category.
User
can click the [Delete] button to delete the selected Message Category.
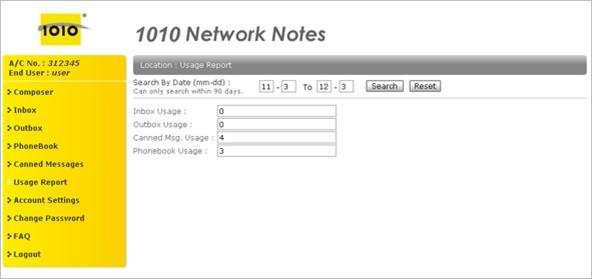
6. Usage Report
Users
can review
the account usage of Inbox, Outbox, Canned Message and Shared Phonebook.
![]()
7.
Account Setting
Users can update
the account setting (for the authenticate user only).
![]()
![]()
![]()
![]()


![]()

![]()

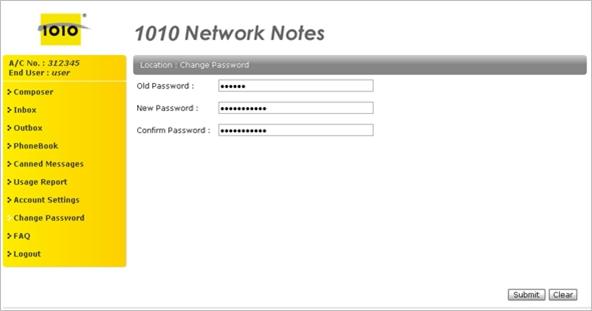
8. Change Password
![Rounded Rectangle: Input the “Old Password”, “New Password”, “Confirm Password” and Click the [Submit] button to change the password](nnn_userguide_user_en_US_files/image340.gif)

![]()
================================================== End
========================================================